
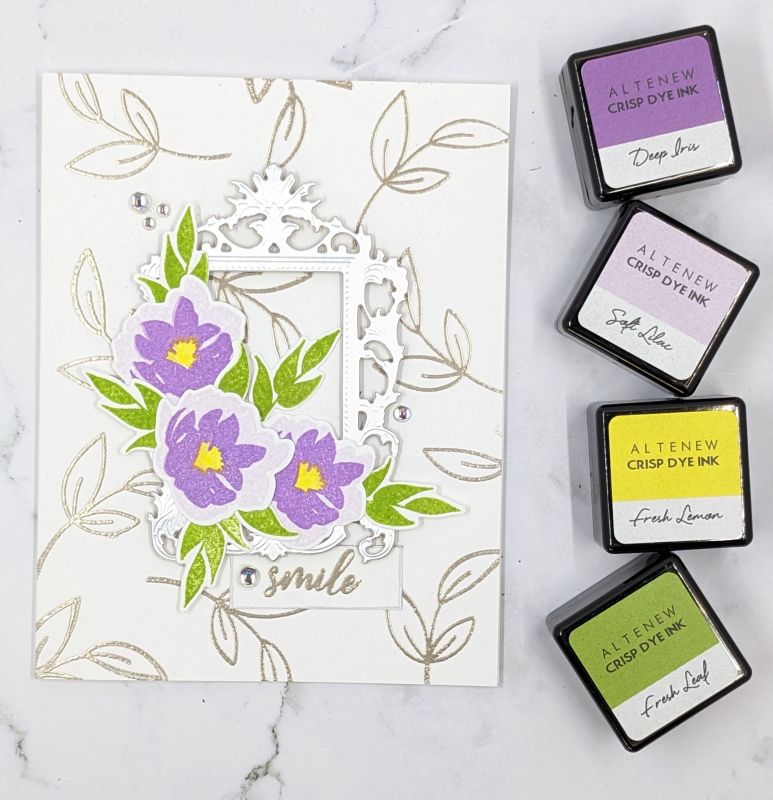
Next in my Altenew Educator Certification Program trek, I completed Easy Die Cutting Techniques taught by Yana Smakula (available under the Classes/Monthly Classes heading on the Altenew website). It’s filled with fresh ideas for getting the most out of your dies. There are six lessons included in this block: Stamps and Matching Dies, Stenciling with Dies, Negative Die Cutting, Embossing with Dies, Inlaid Die Cutting, and Holiday Cardmaking. I chose to use stamps and matching dies. Let’s explore how I used die cuts with this card.
Assembling the Card Using Die Cuts
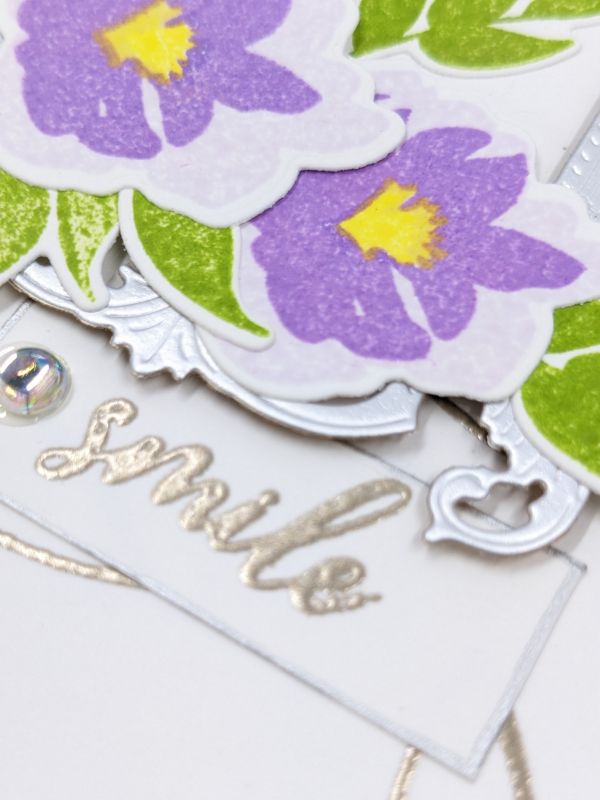
Starting this project, I used a leaf stamp from the Paint-A-Flower: Poppy set. I stamped it using Altenew’s Embossing Ink and used the Platinum Crisp Embossing Powder. After I heat set it, I put it aside. Next, I die cut the ornate frame from the Heart frame die set and silver paper. Then I stamped the flowers and leaves from the Mini Delight: Smile Blooms stamp and die set, using Fresh Lemon, Fresh Leaf, Soft Lilac, and Deep Iris. I stamped “smile” and heat embossed it, and used the silver Must-Have Gel Pen around the edge of the paper. Finally, I layered the elements to the card base. To finish, I used mini pop dots on the silver frame to give it dimension, and added a few clear drops from PinkFresh Studios.
What I Learned
Die cuts are an easy and effective way to add a lot of dimension to a project. It sure beats fussy cutting images. Use a few pop dots or some foam tape instead of glue or a tape runner, and you have great focal points and dimension. So many stamps sets have accompanying dies, making it easy to make exquisite creations you’d happily share with almost anyone.
See my previous AECP homework assignments: layering 3, layering 4, and stencil.